Crafts from paper and cardboard
Paper and cardboard are the most common materials for creating original crafts and home decorations. Not only adults, but also small children can make various shapes, appliques and postcards.
Peculiarities
From ordinary paper and cardboard, people who are fond of creativity can create crafts in different techniques. In the process of work, several basic types of materials are used.
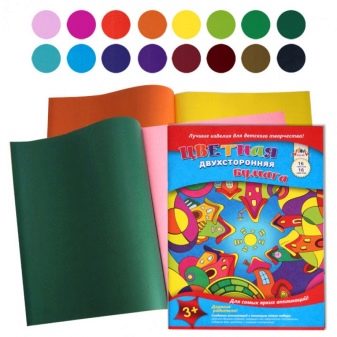
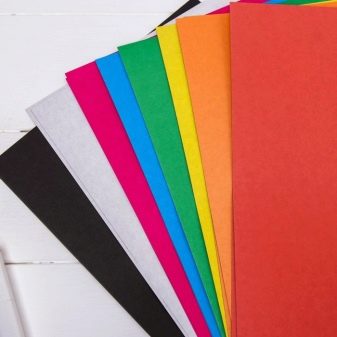
- Thin paper. It can be both one-sided and two-sided. The first one is used to create the simplest applications and holiday cards, the second one is perfect for various voluminous products. You should not buy paper that is too thin and gray. She quickly gets wet and tears. In addition, crafts made from this material turn out to be pale and not very attractive.
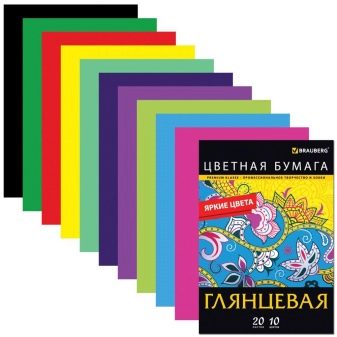
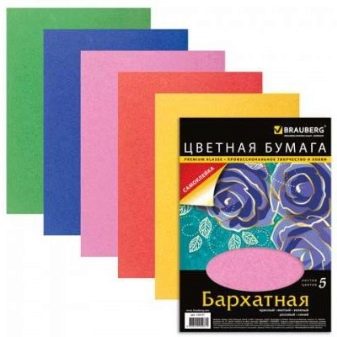
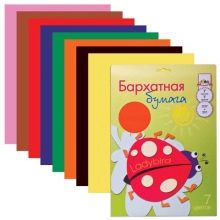
- Velvet paper. This material is best for creating beautiful cards and party decorations. It is distinguished by its bright color and pleasant texture. High-quality velvet paper should not crumble or wrinkle strongly at the folds.
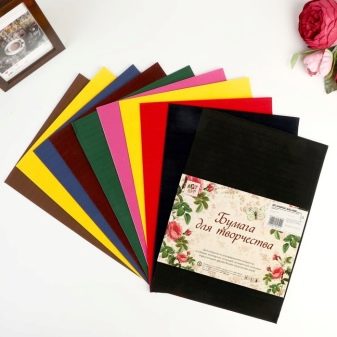
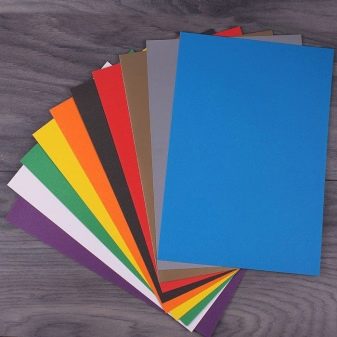
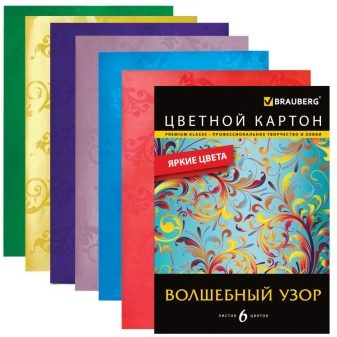
- Colored cardboard. This material is more dense. It is suitable for creating both postcards and volumetric crafts. Colored cardboard can be coated or uncoated. The first option is best for young children.
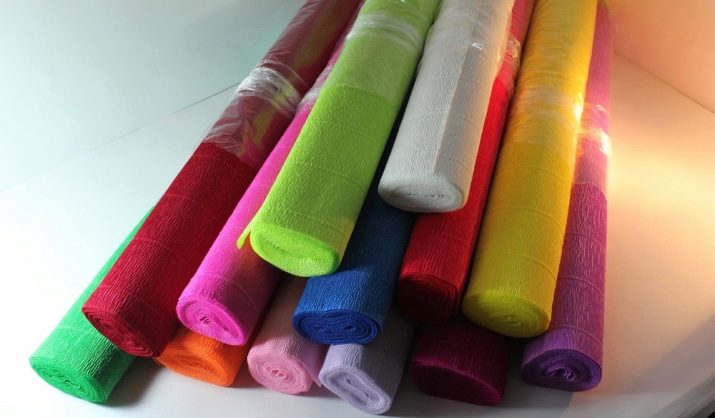
- Corrugated paper. This material with a soft, embossed surface is most often used for creating volumetric crafts. Beautiful flowers and pompons are made from it. Besides, corrugated paper is great for decorating gifts.
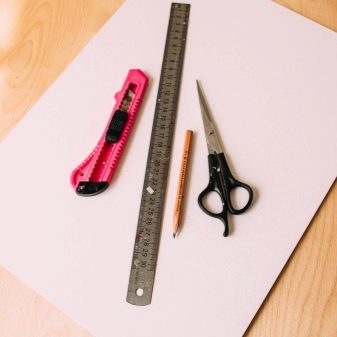
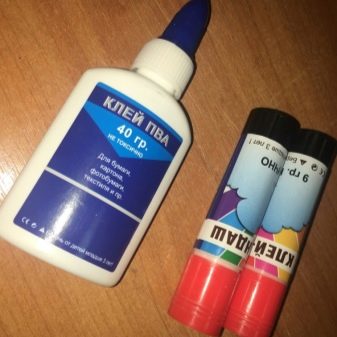
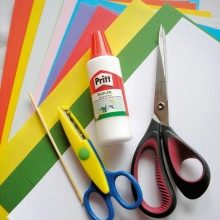
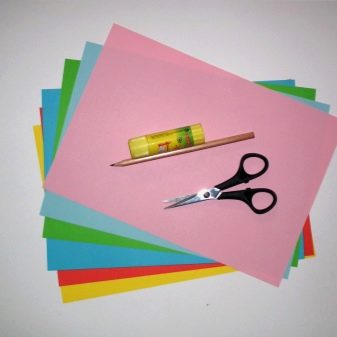
To create crafts, you also need scissors with regular and curly blades, a stationery knife, a ruler and a pencil. Various types of glue are also used in work. Glue stick and PVA are suitable for creating crafts from tissue paper. When working on scrapbooking products, hot melt glue is used.
It is also suitable for creating all kinds of murals.
Making postcards for children
Children, who are just getting acquainted with different types of creativity, first of all make postcards from paper and cardboard. They are both flat and voluminous.
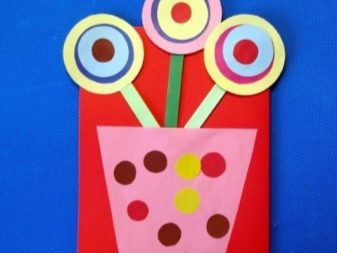
Postcard with lollipops
Even a preschooler can make such a simple postcard. The step-by-step process of its creation is as follows.
- First you need to prepare a monochromatic base. Fold a light piece of cardboard in half, gently smoothing the edges. This must be done carefully so as not to damage the workpiece.
- From a sheet of thin paper of any color, you need to cut a glass of a suitable size and glue it to cardboard. In this case, only the lower and side parts of the figure need to be coated with glue.
- Three straws must be cut out of green paper. They also need to be greased with glue and attached to cardboard. The lower parts of the straws are then placed in a glass.
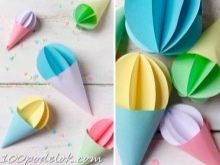
- After that, you need to move on to the formation of lollipops. To do this, circles of different sizes must be cut out of colored paper.
- These pieces are attached to the top of each straw. First, larger circles are glued to the paper, then smaller ones. The remains of small circles can be used to decorate the glass.


By the same principle, flowers can be made from paper. To do this, the edges of the circles must be made curly, and the stems must be supplemented with leaves.
Birthday card
From cardboard and colored paper, a child can make a beautiful birthday card for family and friends.
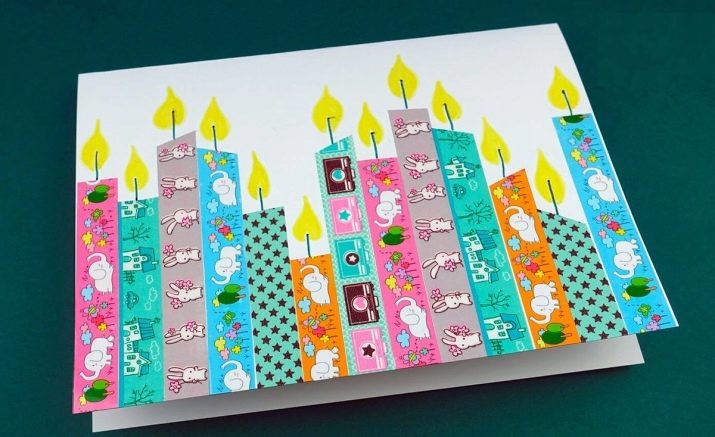
- Craft with candles. To create a postcard, fold a sheet of white cardboard in half. You can decorate the craft with strips of plain colored paper or scrapbooking materials. They are attached to the base with a glue stick. When the free space of the postcard is filled, you need to draw lights over the candles with ordinary felt-tip pens.
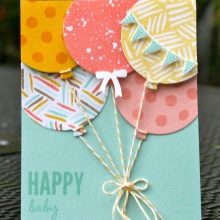
- Postcard with balloons. You can also steal a holiday card with balloons. They are also cut from colored paper. These pieces are attached to the top of the postcard. They are joined by colored threads, which are tied with a bow at the bottom of the crafts. To decorate balls from colored paper, you can cut bright flags and bows.
A thematic inscription will complement the craft.
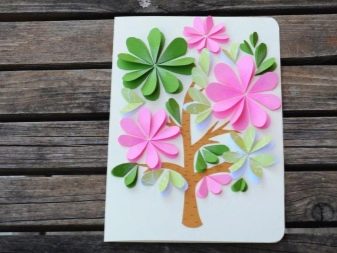
- Volumetric craft with flowers. To create such a postcard, a large sheet of paper must be bent in half. A rectangle of a different color is attached to the front of it. On it is a glass cut out of thin paper. When the base is ready, you can proceed to decorating the postcard. It is necessary to make strips with embossed edges from velvet paper. Each such detail is twisted into a volumetric flower and attached to the postcard. Bows and beads complement the composition.
Such simple homemade cards will be a pleasure for any birthday person.
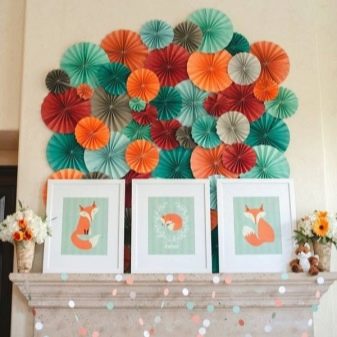
Light panels and applications
Wall paintings, panels and appliques can be used to decorate any room.
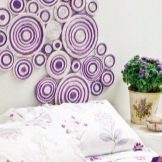
Panel from circles
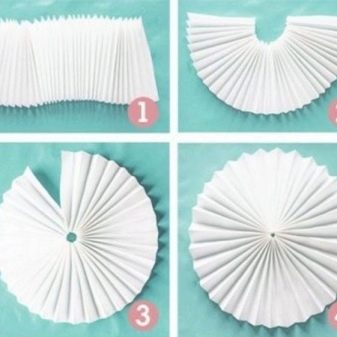
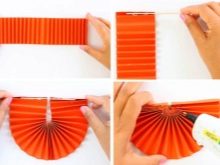
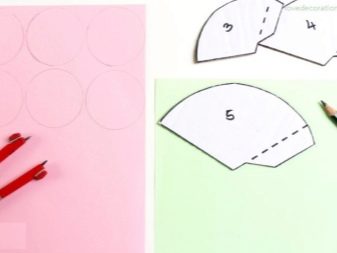
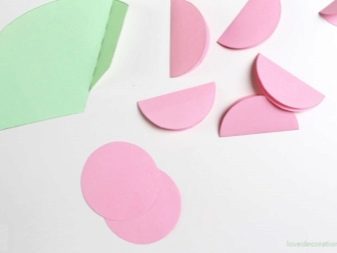
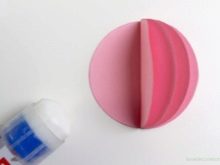
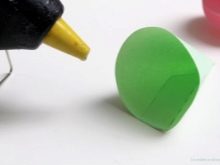
Simple images can be created using regular double-sided paper circles. Such blanks are made very simply. The first step is to fold a sheet of paper into an accordion and bend it in half. The extreme stripes must be glued together. Another semicircle should be made from the second sheet. After that, both parts must be connected together. The resulting circle must be carefully straightened. It should be smooth and neat. Using circles of different colors and sizes, you can create both abstract images and full-fledged patterns from flowers on the wall.
Flowers from tubules
Compositions of colored tubes are no less beautiful. Blanks for them are also made of double-sided paper, and then twisted into a spiral and mounted on the wall. Crafts can be done in any color.
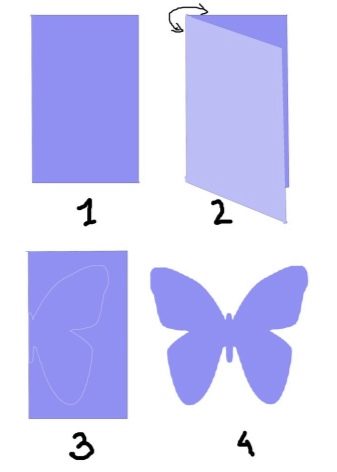
Panel of paper butterflies
Butterflies of various shapes and sizes are often made from thick colored paper. All that is needed to create such a figure is to fold the sheet in half and cut the wings out of it. Butterflies can be made single-layer or double-layer, connecting two or three multi-colored blanks. In some cases, they are complemented with neat tendrils of velvet paper or colored threads. Figures can be mounted directly to the wall. This is usually done using small pieces of double-sided tape. In addition, they are often hung by strings.
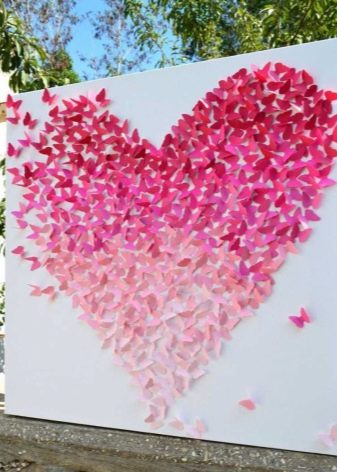
Such blanks are used to decorate rooms or decorate a photo zone for any holiday.
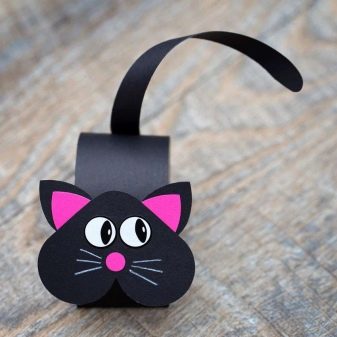
Step by step creation of animals and birds
Very often figurines of various animals and birds are made of paper. Crafts of varying complexity can be made by both adults and children.
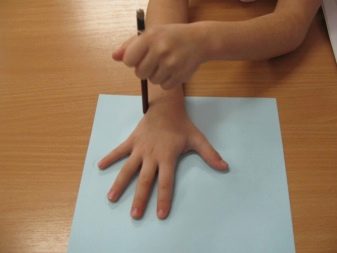
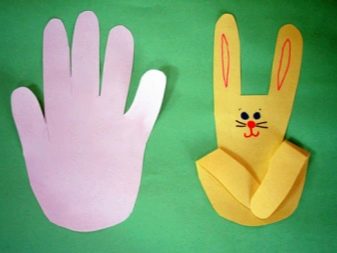
Bunny-palm
Any child can make such a figure out of colored cardboard or paper. All you need is to circle your own palm on the sheet. The resulting drawing must be carefully cut out of paper using sharp scissors. Bend the middle finger and glue it to the back of the craft. The thumb and little finger curl towards each other. When the craft is ready, you can paint it with felt-tip pens or decorate it with eyes and a nose made of colored paper. The hare figurine is attached to a wooden skewer with superglue.
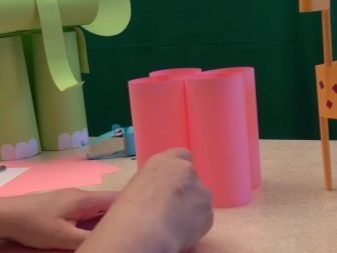
Elephant
This figure is already getting more complex. It is also made of high-quality double-sided paper. The process of creating such a craft consists of the following steps.
- First, you need to draw five large rectangles of the same size on paper and cut them out.
- Large cylinders must be formed from this blank by gluing their edges.
- The four shapes need to be connected together. You can use glue or double-sided tape for this. The base of the craft should be stable.
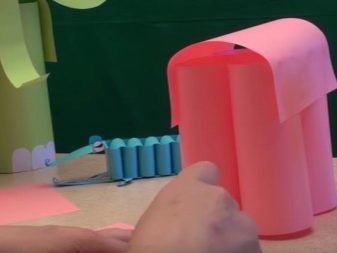
- The elephant's legs need to be decorated with light nails. To do this, you need to cut 6 ovals from white paper and cut each of them into two parts.
- These small pieces are attached to each of the legs. There should be three semi-ovals on one cylinder.
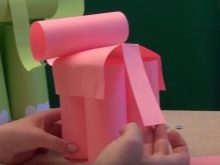
- A thin long strip is attached to the fifth cylinder, which plays the role of a trunk. Above it there are two eyes drawn with a marker or made of colored paper.
- Large round ears are also attached to both sides of the head.
- The head is glued to the base of the figurine. If the craft is not stable enough, two wide strips can be attached to the elephant's legs to hold them together.

Such a cute craft from simple geometric shapes can be made even by a small child.
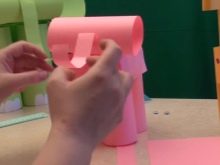
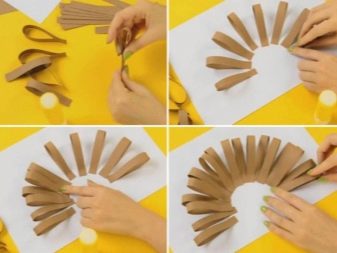
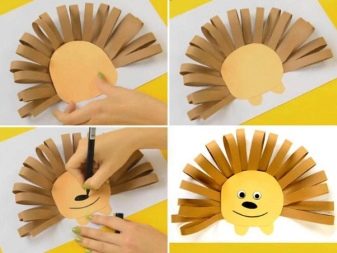
Hedgehog
To create such a craft, the kid will need two colors of paper. The brown leaf should be cut into long strips. The free edges of these parts must be glued together. These blanks are attached to the paper in a circle. Only the lower edges of the needles are fixed on the cardboard.
When the base is ready, you can attach a circle of lighter paper to it. The legs are made of the same material. They are glued to the bottom of the figure. The hedgehog's muzzle can be painted with markers.
The process of creating such a craft will definitely bring pleasure to the child.
Swan
An elegant paper bird can be made in different ways. The simplest and most understandable technology for creating a swan is suitable for small children.
- The base of the craft must be cut out of thick white cardboard. You can use a piece of a box instead.
- This figurine is attached to a blue paper base using quality glue.
- A sheet of white paper should be cut into long thin strips. Each of them must be carefully folded in half and held together with a glue stick.
- Having made the required number of blanks, you can begin to fix them on the sides of the figure. The closer these details are to each other, the more voluminous and more beautiful the swan turns out.
- When the craft is ready, the bird's face can be painted with a marker or decorated with light paper details.
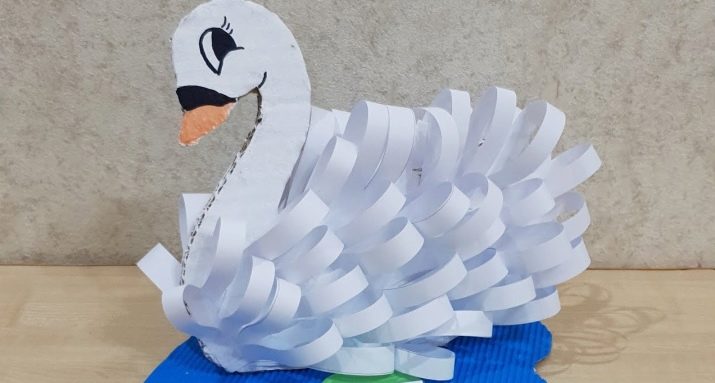
The finished swan looks luxurious.
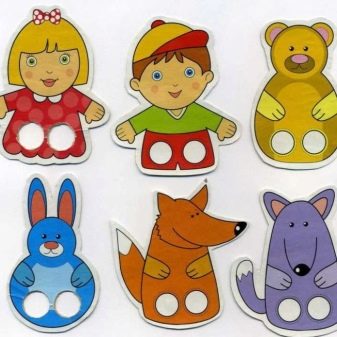
Figures for the puppet theater
You can make bright animals and fairy-tale characters from thick cardboard of different colors, which will be used by kids for various performances. Making such figures is as easy as any other applique. The base is cut from paper of one color and complemented by paws and ears of a different color. Round finger holes are cut at the bottom of each shape. Using such blanks, a little director will be able to play any fairy tale in front of his family.
What else can you do?
From cardboard, paper and glue, you can create not only beautiful, but also useful products.
Food
Fruits and sweets made of cardboard and colored paper can be used both for various games and for decorating the room for the holiday.
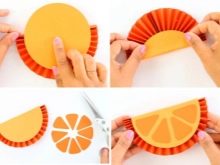
- Orange. To create this craft, double-sided colored paper must be folded like an accordion. The two outer strips are connected to each other so that a semicircle is obtained. Two parts of a slightly smaller size are cut out of cardboard of a lighter color. They are attached to the base with glue. The craft is complemented by bright triangles with rounded edges. Thanks to this design, the craft looks like a real orange slice.

- Ice cream. A favorite children's delicacy is made of thin multi-colored paper. Several even circles must be cut from this material. Each of them must be folded in half. These parts must be glued together, forming an even ball. From a denser cardboard, you need to roll an even cone and carefully cut its edges. A ball of ice cream is attached to the inside of this piece. If desired, the craft can be decorated with colored beads or stars.
You can also make interesting applications or holiday flags in the form of cakes, cupcakes and other sweets from colored paper.
Watch
Parents and educators can use the colorful paper clock to teach a preschooler or elementary school student how to tell the time. To create such a craft you will need:
- 3 sheets of colored paper or cardboard;
- scissors and glue;
- button;
- felt-tip pens.
The process of creating such a useful craft consists of the following steps.
- Two large circles must be cut out of thick paper. One of them will be darker, the second lighter.
- Draw a smaller circle in the middle of each of the details.
- Both paper elements must be divided into 12 segments.
- On each of them, you need to write numbers with a felt-tip pen. At the bottom - minutes, at the top - hours.
- The segments of the upper circle must be separated from each other by carefully cutting with scissors.
- Two multicolored dials need to be connected together. In this case, the glue is applied only to the middle of the circle.
- Two arrows need to be cut out of the remains of colored paper. They are attached to the dial with a button.
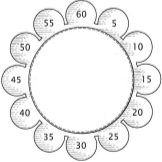
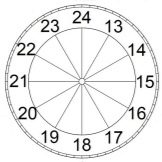
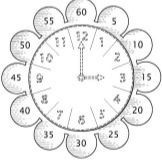
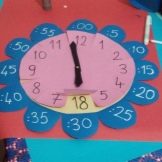
Using such a watch is very simple. The hour and minute hands can be easily rotated as needed.
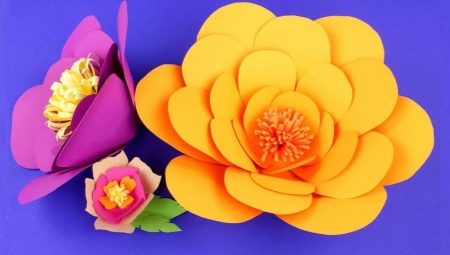
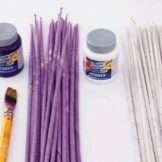
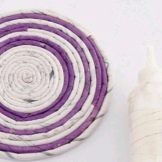
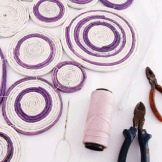
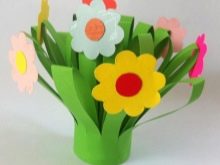
Flowers
DIY paper flowers can be made as a gift for mom, grandmother or teacher. There are some interesting ideas that you can use as inspiration when creating these crafts.
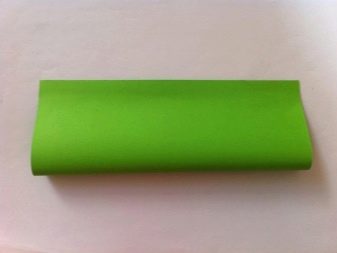
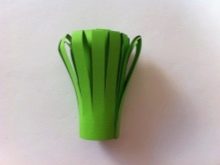
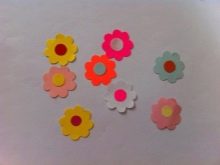
- Spring bouquet. The base of this craft is made of light green paper. The sheet must be folded in half and glue its lower edges. On the second side, you need to make many cuts. The resulting base must be carefully twisted and the free edges must be fixed with glue. The blades of grass must be carefully straightened. Flowers and their centers should be cut out of velvet paper of bright colors. These parts are interconnected and attached to the grass.
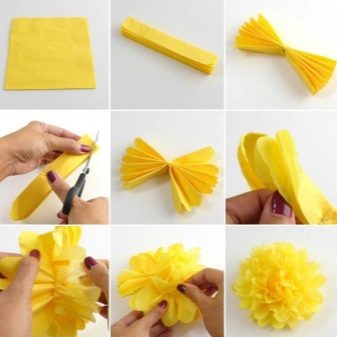
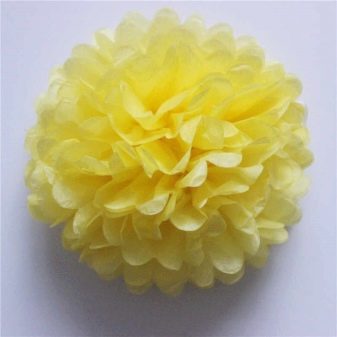
- Chrysanthemum. This vibrant flower is made from soft corrugated paper. You can pick up work material in white or yellow. An even rectangle must be cut out of corrugated paper. It needs to be folded like an accordion. The base must be carefully fixed in the middle with a metal wire.The edges of the workpiece must be fastened together with glue and slightly fluffed. To make the yellow flower more voluminous, its petals are slightly pulled up and to the sides.
Large chrysanthemums made from corrugated paper are often used to decorate the premises for the holiday.
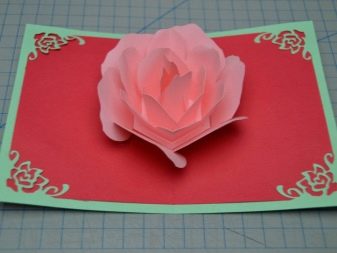
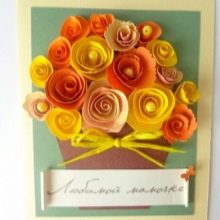
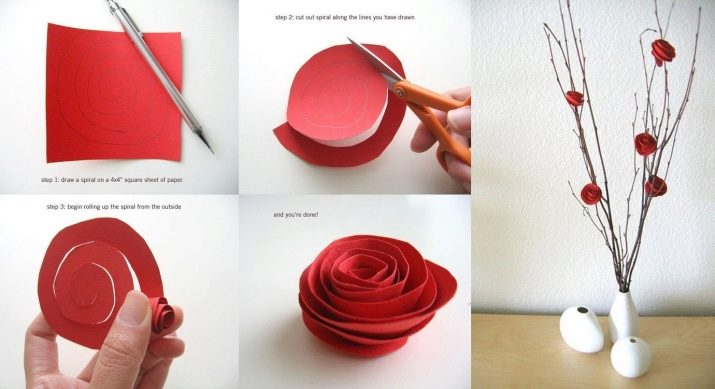
- The Rose. To create such an unusual rose, draw a long spiral on a square piece of paper. The distance between the turns should be no more than 1 centimeter. Cut the paper along this line. The resulting tape must be carefully twisted into a tight spiral. The craft should be voluminous enough. The edge of the rose must be fixed on the base of the bud with glue. The finished rose can be used to decorate postcards or large panels.
The process of making paper crafts is very fun. Therefore, needlewomen should take note of at least a few of the proposed ideas and try to make a couple of postcards and figures on their own or with a child.
25 awesome paper craft ideas in the next video.


